I realised a good while ago that I am interested in categories and boundaries. This is because of my own experience, being ‘half-caste’ in the 60s, 70s and 80s, ‘mixed race’ in the 90s and by the early 2000s I had become ‘dual heritage’. These are all what are termed ‘etic’ or outside categories, how society has characterised me. An ’emic” or internal category would be how I characterise myself, and that would be as ‘Mancunian’. More than just abstract concepts, these labels have implications for the differing ways I have understood myself and been treated in the real world, hence my interest.
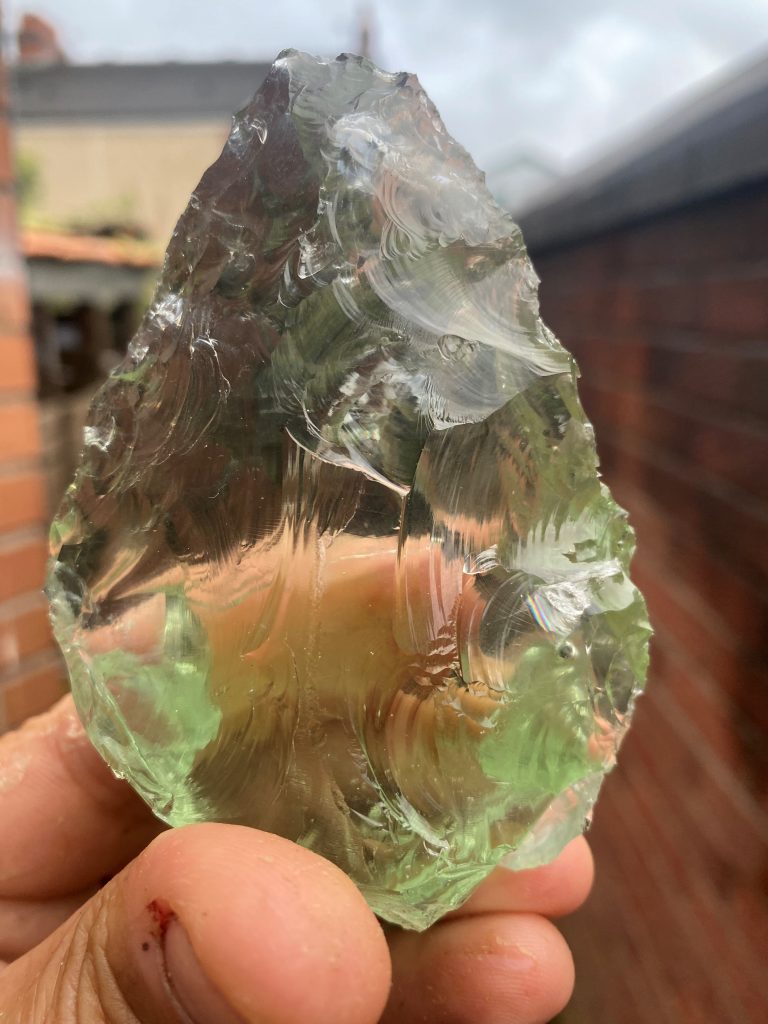
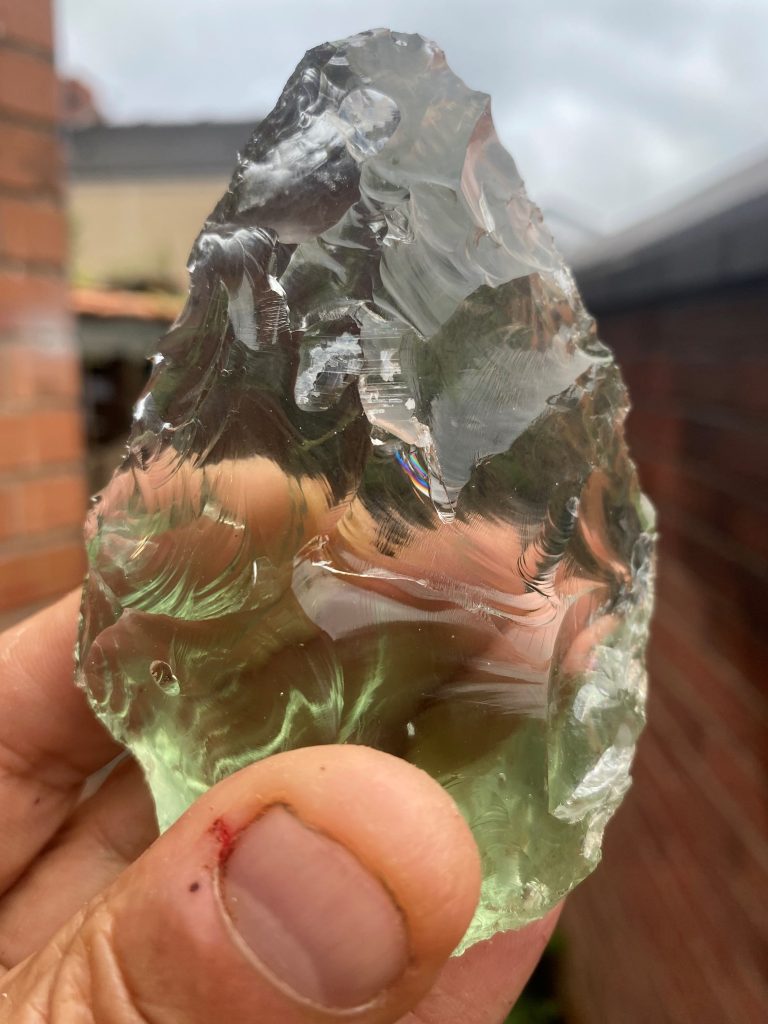
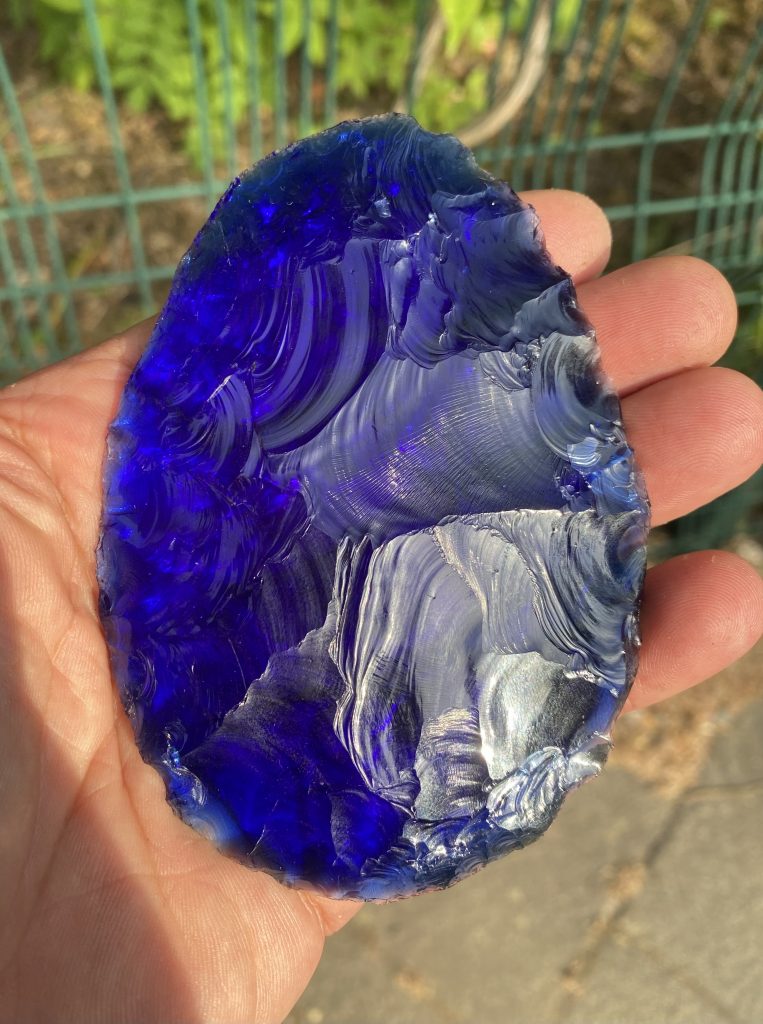
Onto handaxes. I am really liking this most recent offering. It is made from the largest piece of slag glass kindly provided by the folks at Salford Archaeology. I have left the base as is, referencing where it has come from, and in relation to the worked section, I like the thinned serrated edge on both sides. It would make a great cutting tool, and I am super pleased with this one.
So form and potential function if you like, mirror a Palaeolithic handaxe. However, the material it is made from, a slag glass block excavated from a factory in Manchester, anchors it very much in the modern industrial period. It has two, temporally contradictory etic heritages, or narratives captured within one beautiful object.
So what about its emic identity? I don’t think the handaxe itself can tell us, but through my visual and haptic engagement with it I would say it is pretty special. It works for me on every level, and it feels like I have expressed something of myself within the production of this object. It was satisfying to make and I am happy that I have this ability to create things of beauty such as this. And I think that its dual heritage adds to its aesthetic and doubles its narrative value. Happy days!
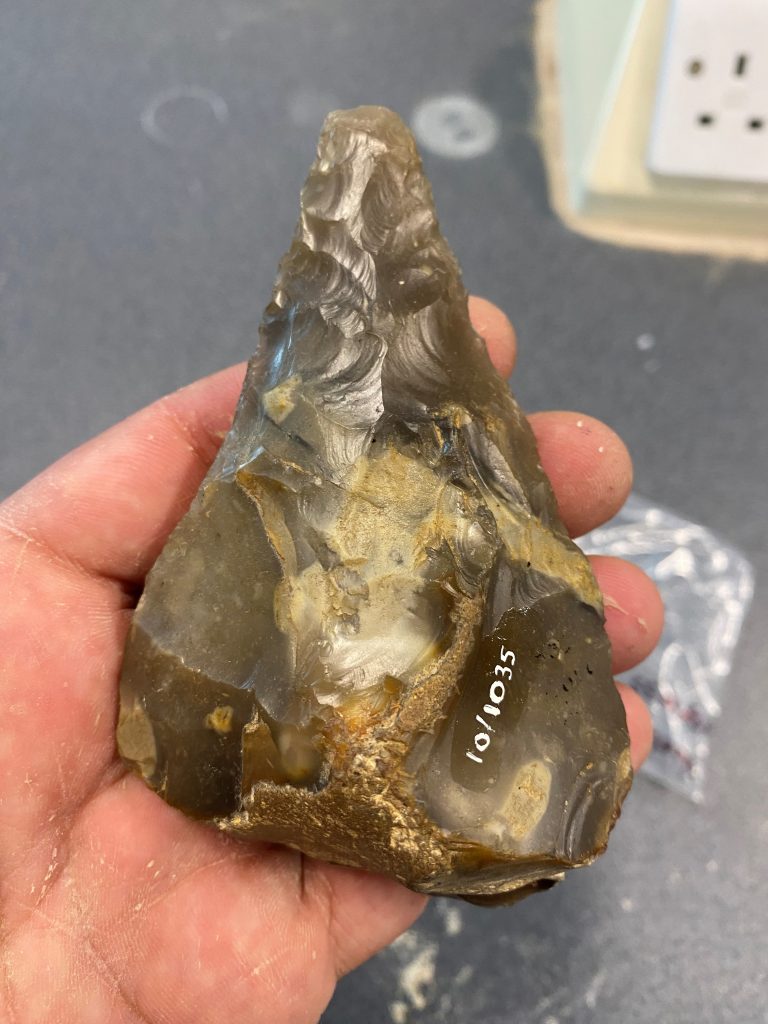
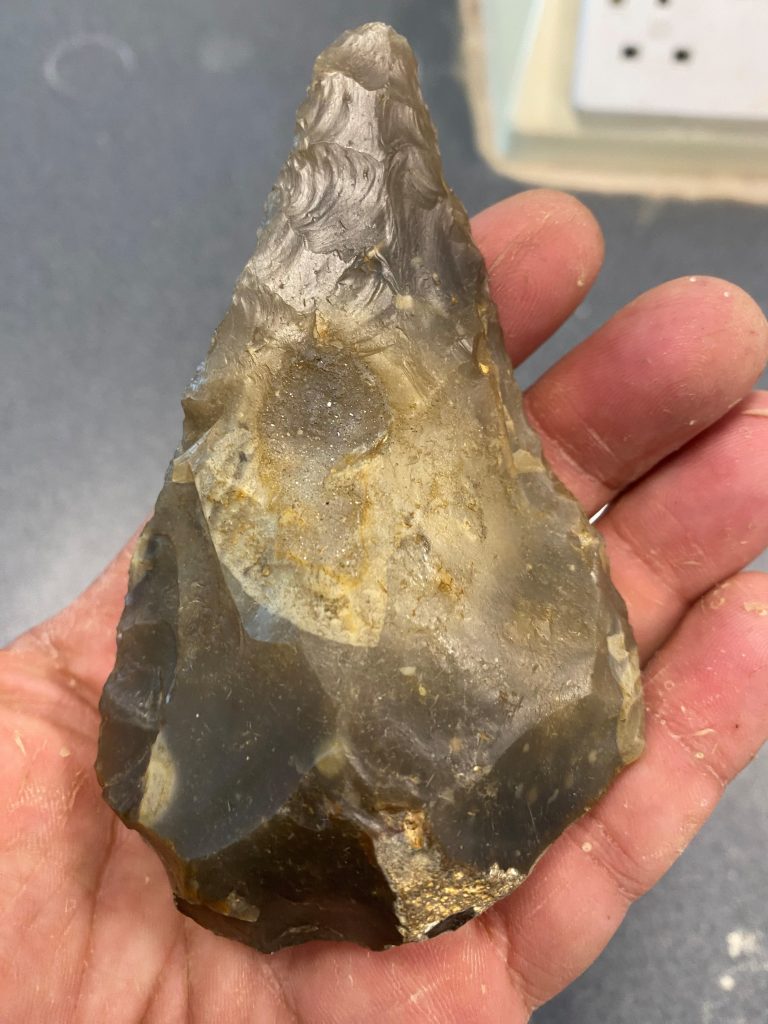
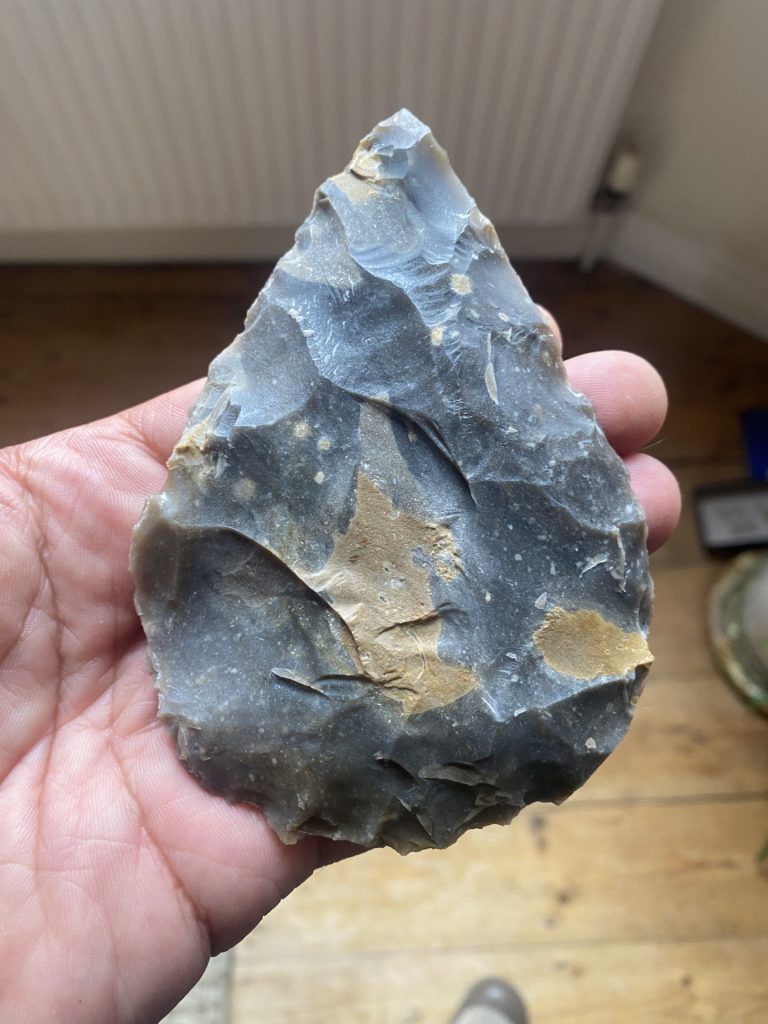
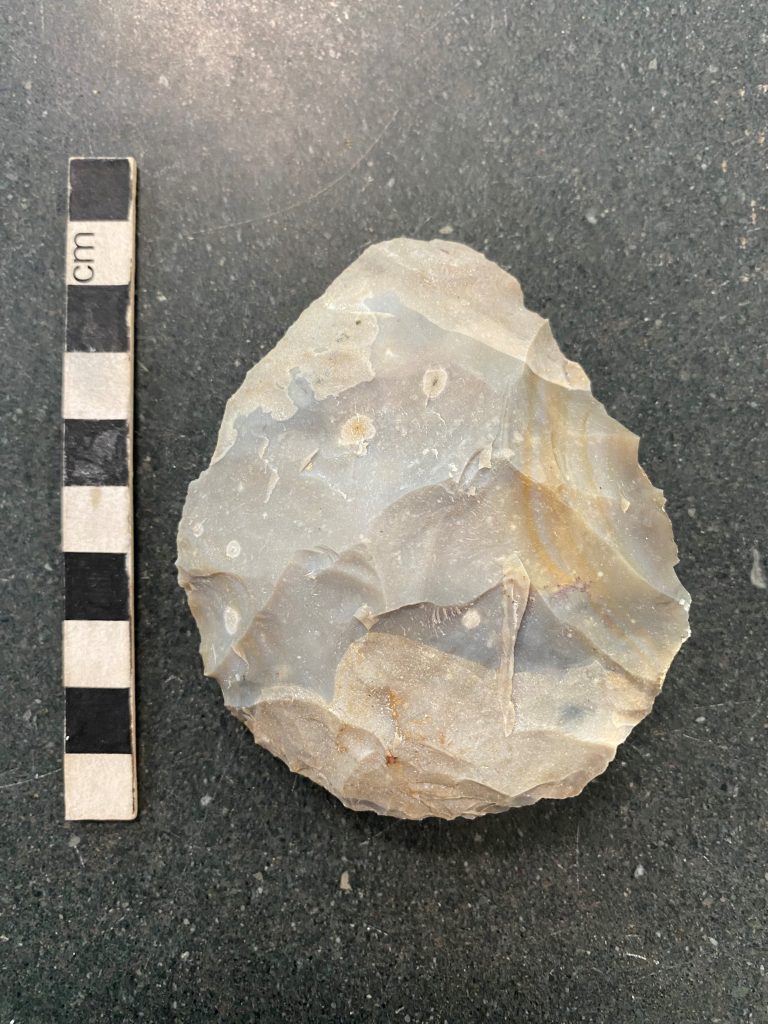
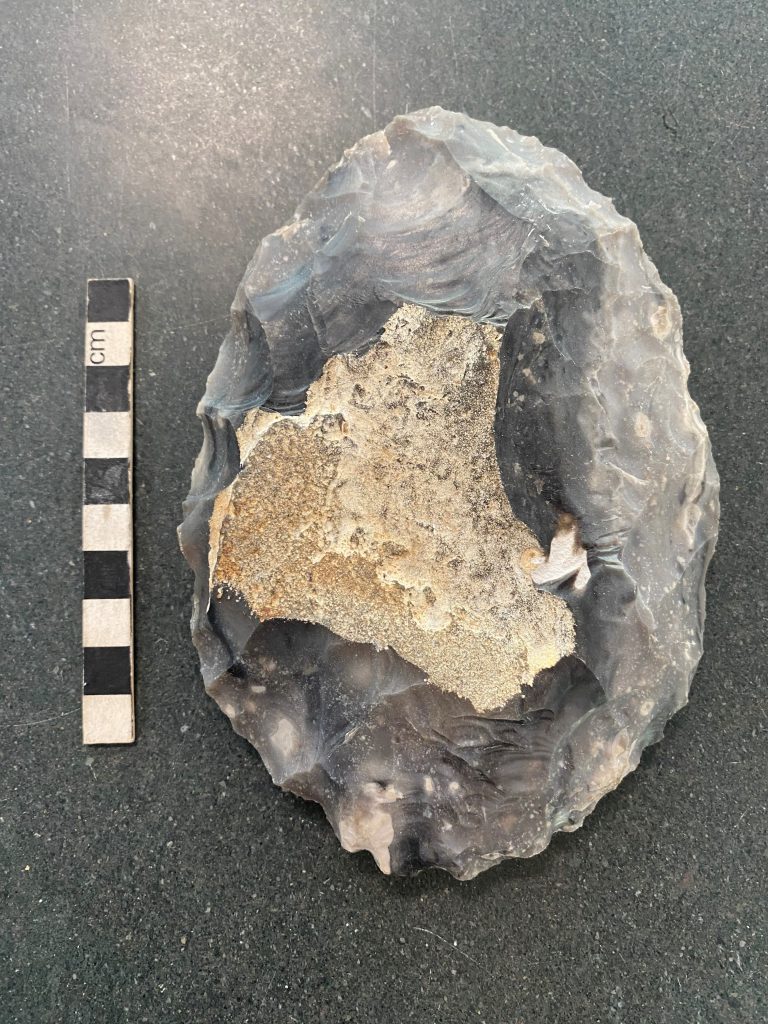
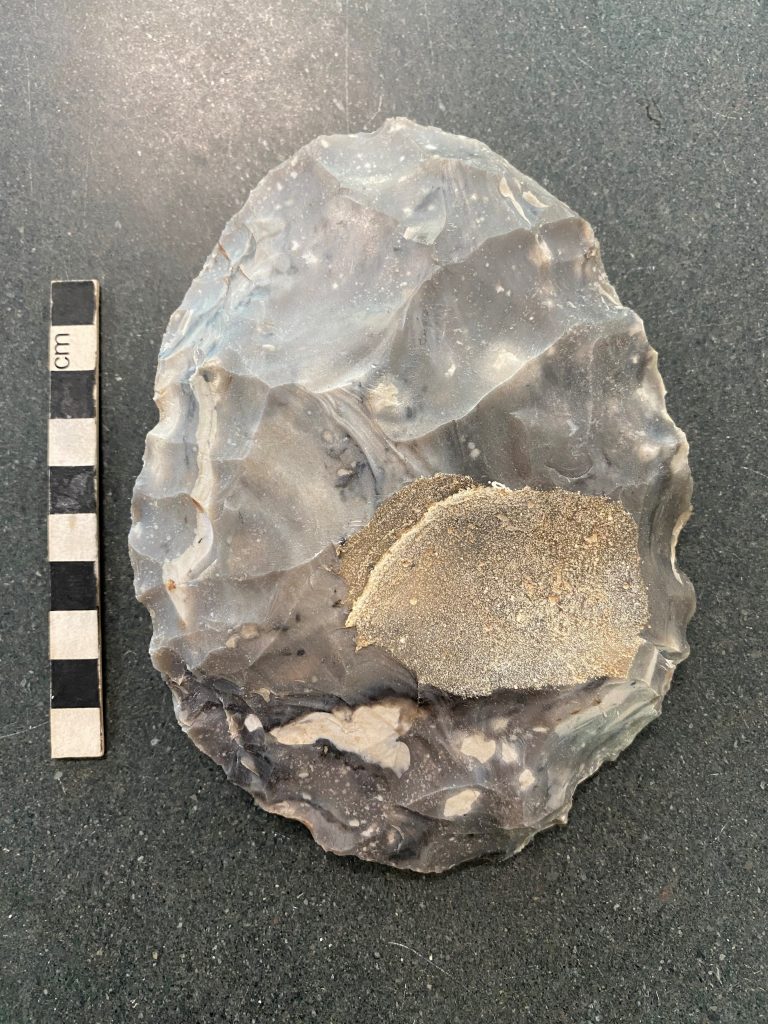
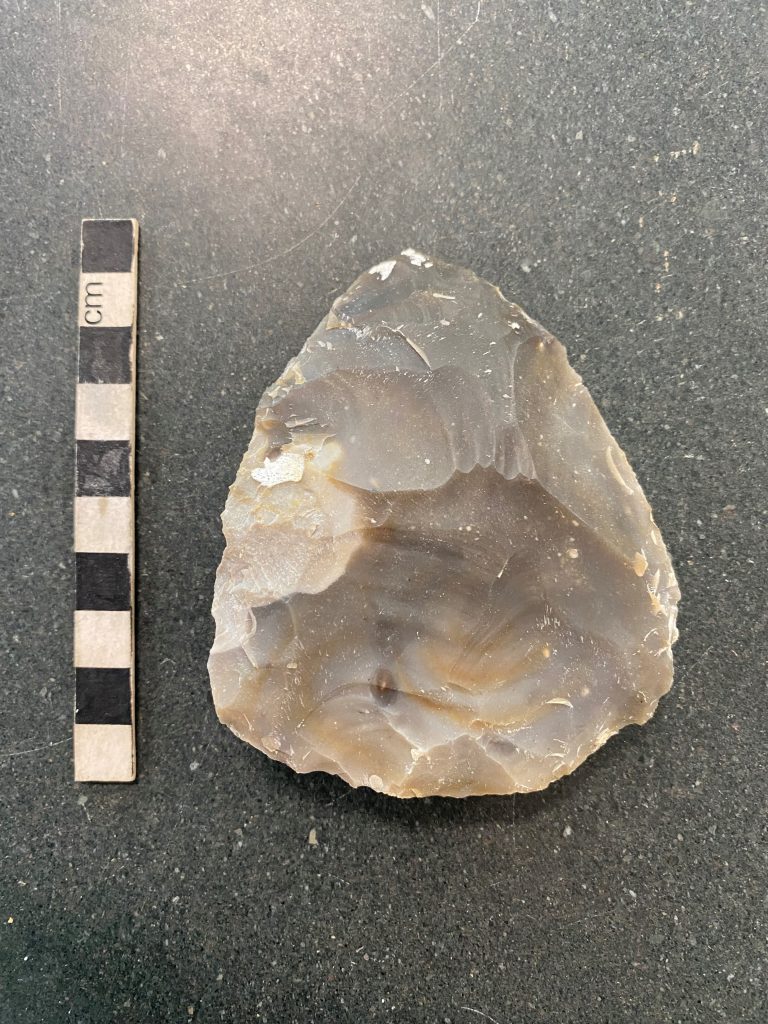
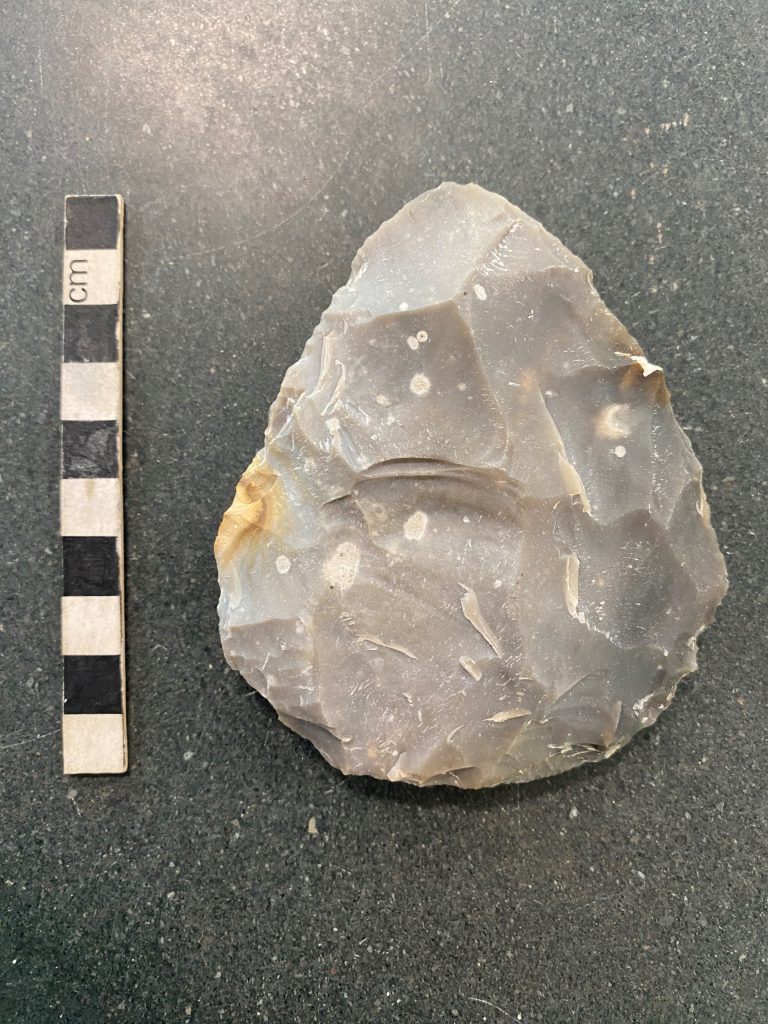
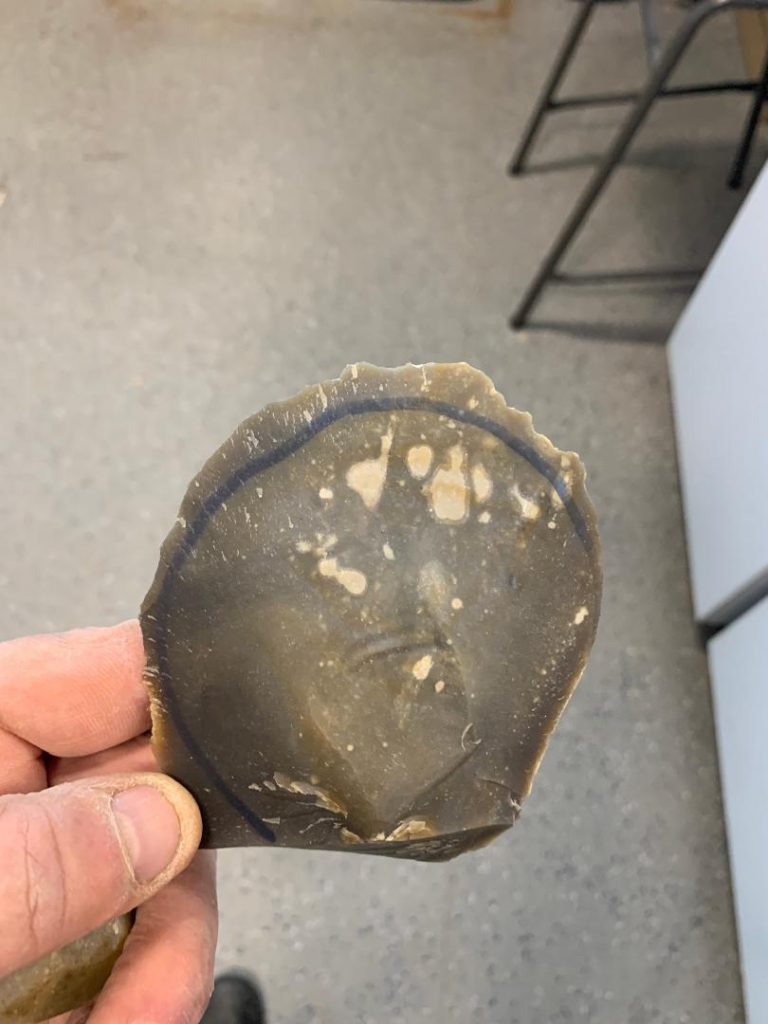
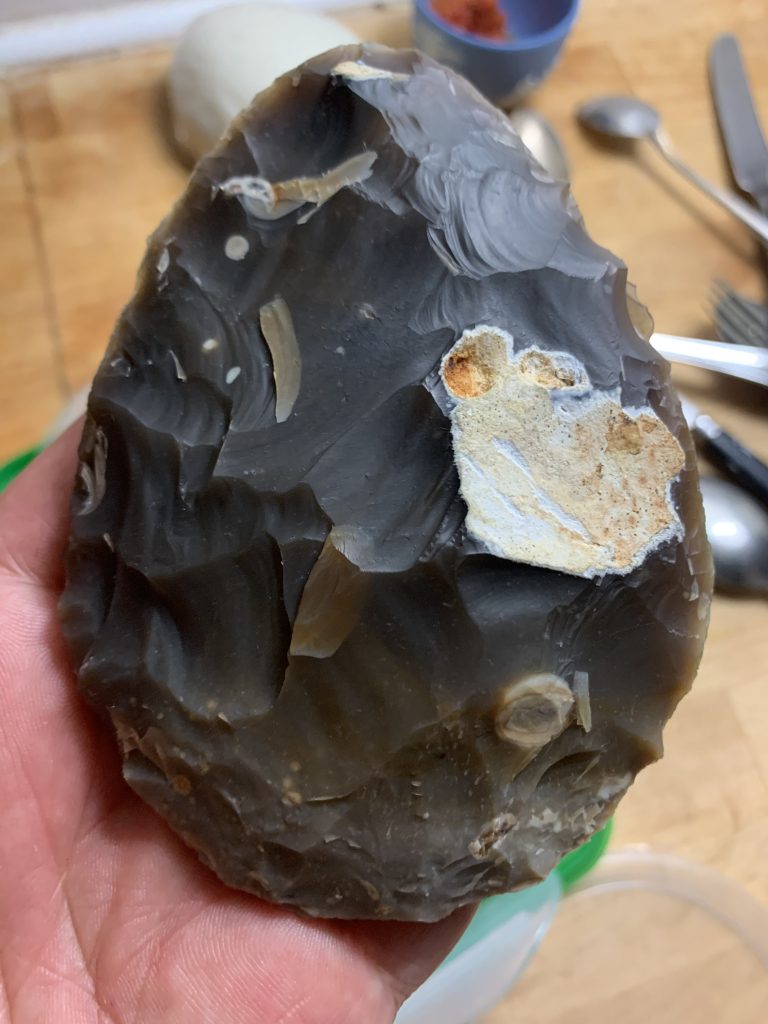
The above handaxe was found by one of my colleagues in our teaching collection, mislabelled as a ‘Neolithic flint handaxe’. It appears to have been produced on a beach cobble and I really like the contrast between the large flake scars on the proximal end, and the much finer scars at the distal. This suggests to me a resharpening process. I also like the shape.
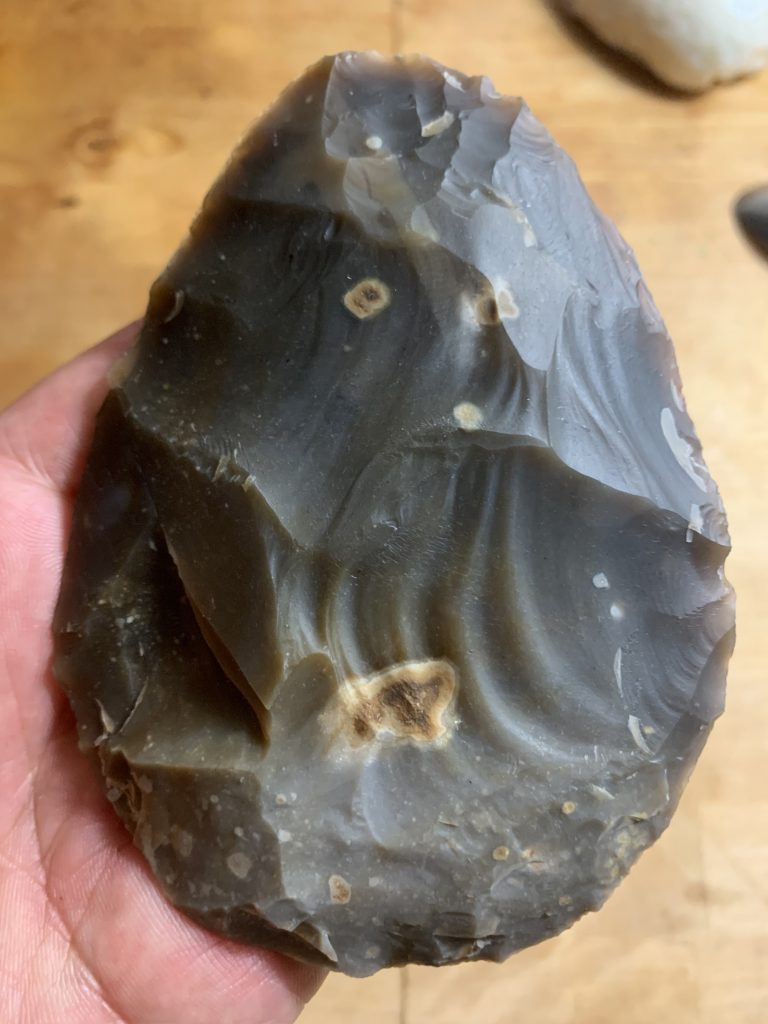
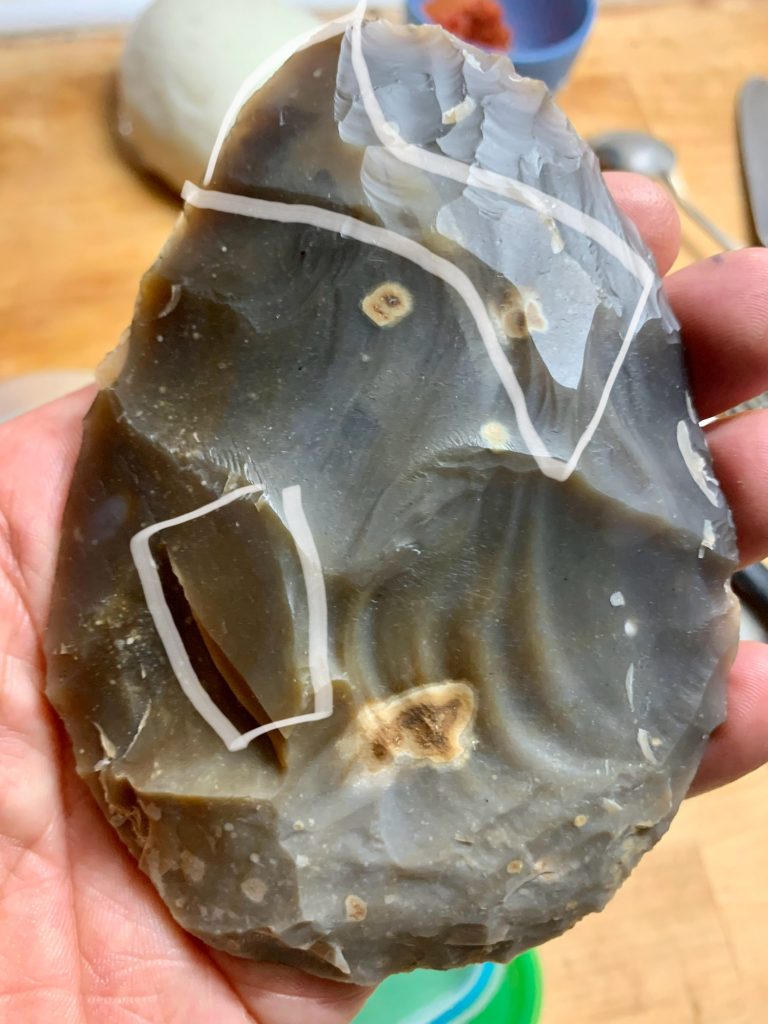
The other face is equally interesting, and I can see this shape and type is what I am going to be playing with over the next few making sessions.
I have what is probably a good habit of giving away most of the stuff I make. In doing so I have received a range of responses from recipients over the years, from super excited, to super confused. However, it feels at the moment like the boot is on the other foot. This is because over the past two weeks I have been graced with some amazing lithics related gifts and now it is me who is super excited! First up from my lithics friend, Alice la Porta.
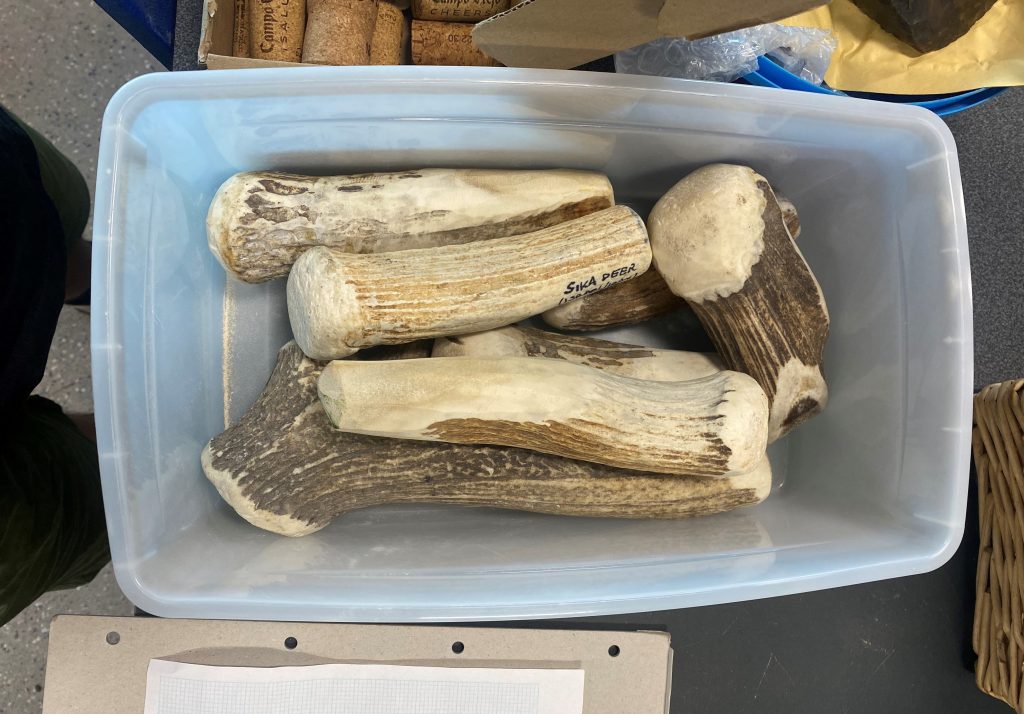
Alice has a new job in Spain, and she had a lot of lithics materials from her post-Doctoral research in Manchester that she didn’t want to take with her, and so she donated them to the Department! Above are some unused heavy antler hammers from a range of deer and countries.
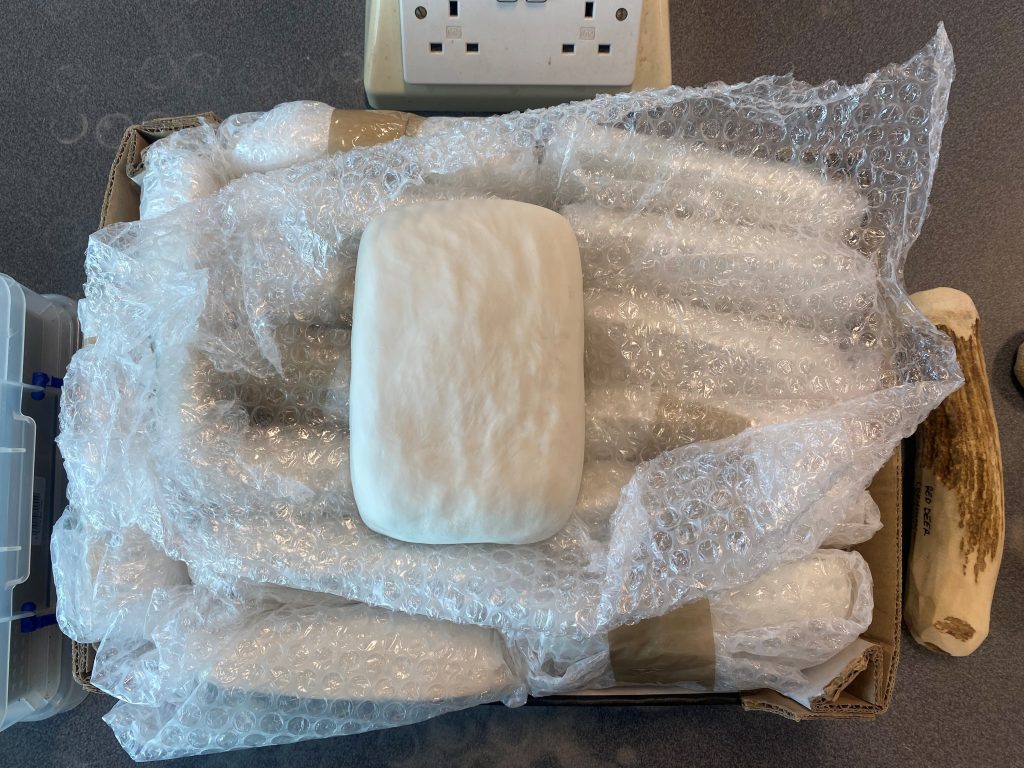
Alice’s post-Doctoral research was looking at the evolution of the human hand in relation to the development of early stone tool technology. To reduce the experimental variability in the handaxe making process she commissioned around 30 porcelain blocks of the same form, so that whoever made the handaxe would be dealing with the same problems. I have inherited around 20 of these!
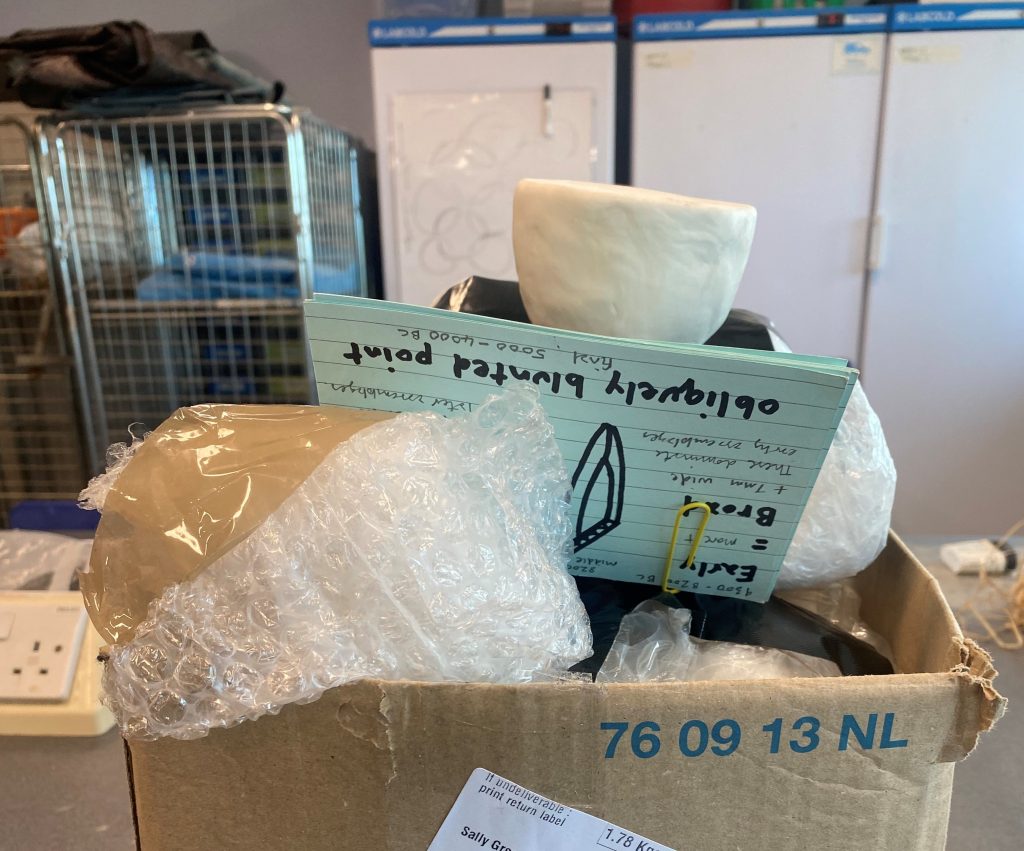
For the same reasons she had around 50 smaller ‘cores’ produced to standardise bladelet production. We have inherited around 40 of these and this seems an ideal opportunity to organises a microlith making workshop with my Mesolithic friend, Stephen Poole.
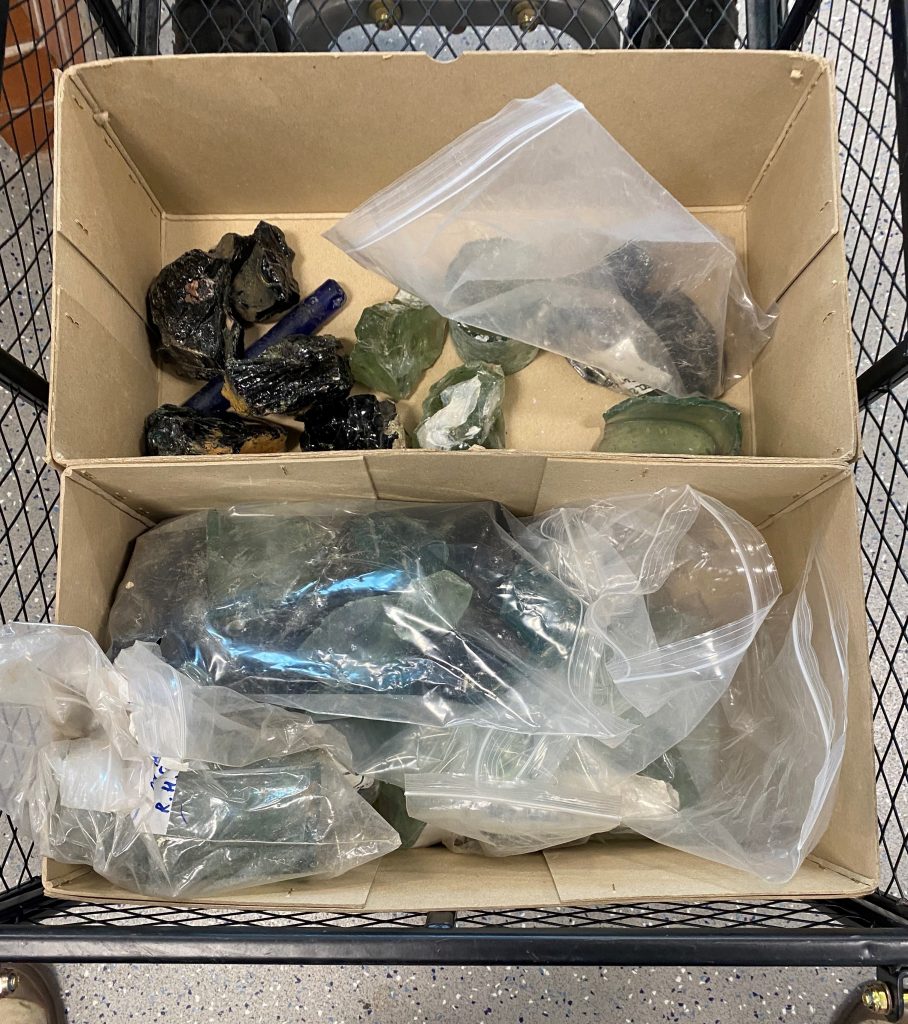
Next up, Jeremy, Ian and Lesley from Salford Archaeology. For various unfortunate reasons, Salford Archaeology has recently closed, and being based in Greater Manchester they had a specialism in Industrial Archaeology. Chatting to Jeremy about sites, I realised they had a lot of glass slag from excavations in Manchester. Fast forward to last week, Jeremy left a large box of glass slag in Ian’s office at the University of Salford and it was passed on to me by Ian’s colleague Lesley . And guess what, it knaps!
Last but not least, a ton of medium sized flint nodules arrived this morning courtesy of Needham Flints from their quarry in Norfolk. This was an end of budget year bonus, and thanks to Osen and Clare for facilitating the purchase and delivery, and Graham, John and Paul from Estates and Facilities and Environmental Services respectively for receiving and storing the pallet in their yard for us.
I think what this series of fortunate (for me and the department) episodes illustrates is the social role of artefacts and materials within the stone tool making process. I now have a series of large Red and Sika Deer antler hammers from around Europe. The porcelain blocks were custom made in Southampton for Alice. The glass was buried in Manchester until the last decade or so, and as discussed, the flint nodules were quarried in Norfolk. My social links have allowed me to access materials from around Britain and Europe, whilst having no direct connection myself.
Through this process I have initiated new connections at both the Universities of Salford and Manchester, and strengthened relationships with established colleagues and friends at Manchester. Alice received my blue glass handaxe as a small expression of thanks. Jeremy, Ian and Lesley each got a glass arrowhead, I think Osen, Clare, John, Graham and Paul each warrant a nice flint handaxe. These feel less like obligations, and more like commissions, which means I will be making nice examples, that I feel acknowledge the value of what they have kindly done for me and the department. I suppose this is where aesthetics comes in, less a functional butchery tool, more a demonstration of skill to produce an object of perceived value, that forms a positive connection between the giver and the recipient.
Writing this, I realise a real blurring between myself and the department. Absolutely none of this would have happened without me recognising and developing these opportunities. At the same time, being part of an archaeology department has provided me with the platform and infrastructure to have these connections in the first instance. I suppose it is an interplay between myself, my work role, and the connections I encounter and develop within that context, and the currency I use to facilitate and nurture these connections is, as you have probably recognised…stone tools.
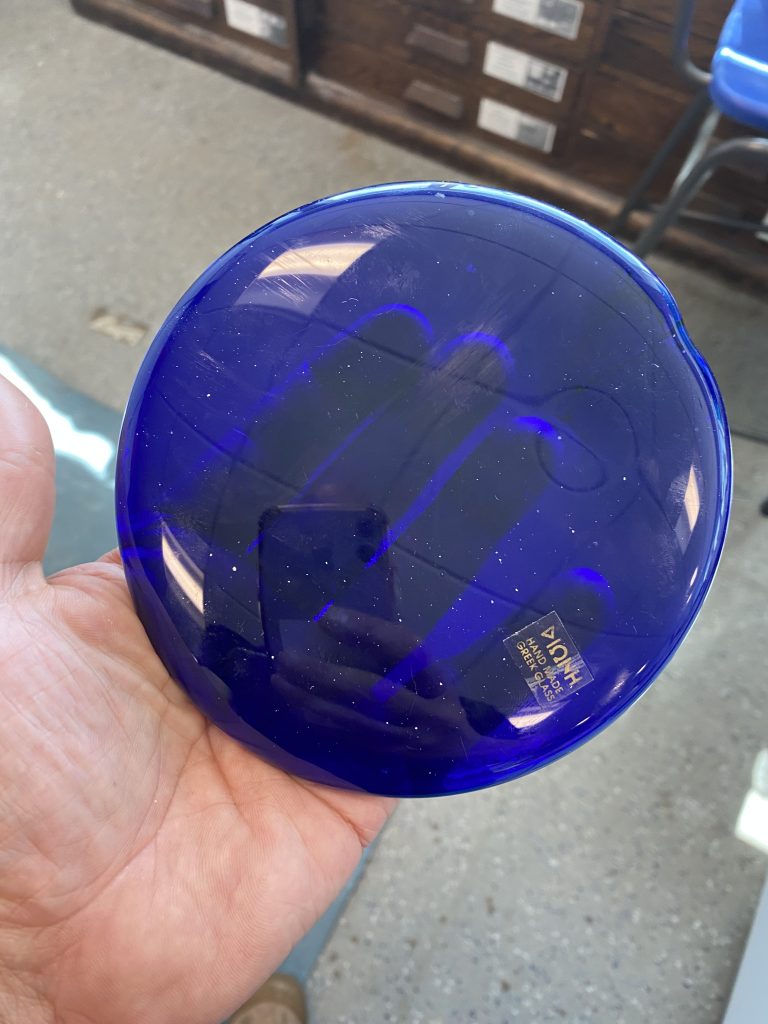
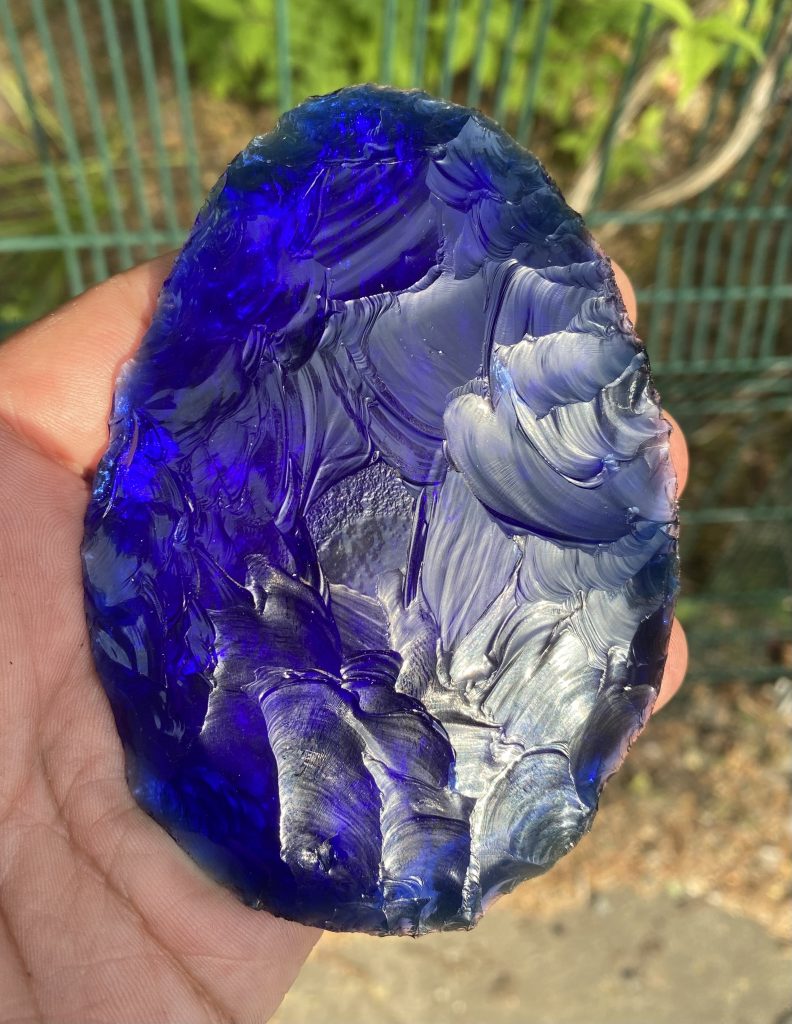
We have just come back from a week in Athens, and the main thing I brought home was a large disc of blue glass, bought at the flea market for five Euros.
Anyway, I found time to hide in the lab for an hour or so and came away with this very nice blue ovate handaxe.
Everything worked well. Turning the edges with a hard hammer, and then thinning using an antler hammer. This is the second iteration, initially it was larger but wonky.
I brought the wonky version home, lived with it for 24 hours and then the following day finished it off so that it is a shape I can live with. I am currently thinking about the difference in experience between my work with emails, spreadsheets and budgets, and escaping into the lab and the satisfaction of making something beautiful. I suspect it is something to do with what that famous stone tool specialist, Karl Marx, termed ‘Alienation’. To be continued!
What is aesthetics? According to the Oxford English Dictionary (OED) Online the word aesthetic is derived from Ancient Greek and relates to sense and perception. In relation to the French noun esthétique the OED Online provides this explanation from 1819, a: ‘set of rules or standards by which art is judged’. Yesterday my ‘workshops’ friend, Laura Thompson organised for us a handaxe making session for half a dozen academic staff and students in the Archaeology labs. My ‘Mesolithic’ friend, Stephen Poole made a trip in from Rochdale to help me out with the teaching process. In the discussion session at the end the subject of aesthetics came up a couple of times.
However, to start at the beginning, initially I presented a series of handaxes to the participants, both replicas I had made and ‘real’ ones from our teaching collection. These are used to introduce how stone tools were used historically to understand and create a prehistoric chronology. If we take a step back and think about the structure of the session, a group of flintknapping beginners are presented early on with models of ‘correct’ form, explained by myself, a perceived ‘expert’.
To shift the discussion slightly I would like to introduce the phrase ‘Like mom’s apple pie’ as it is interesting to me on two levels, it uses an outcome (an apple pie) or experience (eating the apple pie) to characterise something as inherently ‘correct’ or ‘positive’. It also links generationally, looking backwards to find a ‘correct’ or ‘positive’ model.
So, to link together apple pies and handaxes it would seem to be a common process to identify past examples as an ideal with which to measure present output. This further links to the work of the anthropologist of art, Alfred Gell, who argued that aesthetics is culturally specific. He goes on to argue that aesthetics serve a social function, and are imposed upon objects so that those objects can be used to achieve some social goal.
If we also consider the typological approach, using particular types of objects to denote particular epochs of prehistory or human culture groups, I would argue this is following a similar model. An ‘expert’ has identified certain more or less measurable parameters which certain objects sit within, and others outside. Those objects that fall within are categorised as one particular period or culture group, those outside may be outliers, or belong to a different period or culture group altogether. This system was developed early on by pioneers such as Gabriel de Mortillet using museum collections. By the 1930s field archaeologists were using an object’s archaeological context to help clarify the above models, and by the 1950s archaeologists were looking to process, in order to understand at what stage in its lifecycle an object sat. Famously, this can be in contrast and conflict to the typological approach, as the object changes shape and form as it wears down through use and then re-sharpened.
To return to our workshop, participants are presented at the beginning with idealised models that carry authority because of the context of presentation (University of Manchester Archaeology Laboratories), and the skilled practice they embody. They also carry with them an aesthetic, and for the replicas produced by me, it is my aesthetic. This is separate from any butchery process but clearly embedded within an archaeological teaching and learning environment, and the history of European stone tool research. My stone tool aesthetic is a modern complex of academic models, bodily practice in negotiation with a range of materials, resulting ultimately in a selection of examples I am ‘pleased with’ and presented to the participants.
As the workshop proceeds the skilled practice that the examples embody becomes apparent to the participants, as they attempt to achieve a similar result. Shape, size and form present a model of idealised outcome that participants strive to achieve within a limited three hour window. For teaching and learning purposes I spend the last hour or so making sure everyone goes home with a functional cutting tool, so that they understand that flintknapping is a game they can win.
Back to aesthetics as a form of cultural control. My knowledge of the history of prehistory and the differing theoretical approaches has been shaped by a western Undergraduate, Masters and Doctorate education in Archaeology, theory and lithics. The development of my ability to make stone tools is discussed elsewhere, but the selection of aesthetic examples is indeed designed to elicit certain social responses, a subtle recognition of my ‘expertise’, and therefore a positive consideration of my guidance. Within this reading aesthetics has been something I have interacted with throughout my lithics education. Certain people, objects, texts and drawings will have influenced my aesthetics over the years and I now perpetuate this emergent aesthetic through my own teaching in the present. As such the Western European idea of a handaxe is perpetuated through time and from one generation of archaeologists to the next. To basterdise the 1819 definition I am both consciously and unconsciously selecting and perpetuating a: ‘set of rules or standards by which a handaxe is judged’.
I have started walking to work and there is a lot of this kind of stuff going on in my head at the moment!
I found out late last month that the Australian archaeologist, Kim Akerman, had died peacefully at his home with his wife, Val, in Hobart. Even typing this makes me feel tearful, for a man who lived on the other side of the world and whom I had never met in person. So why tearful? In spite of the fact that we never met face to face Kim has been incredibly helpful and supportive, and played a fundamental role in my own stone tool making journey.
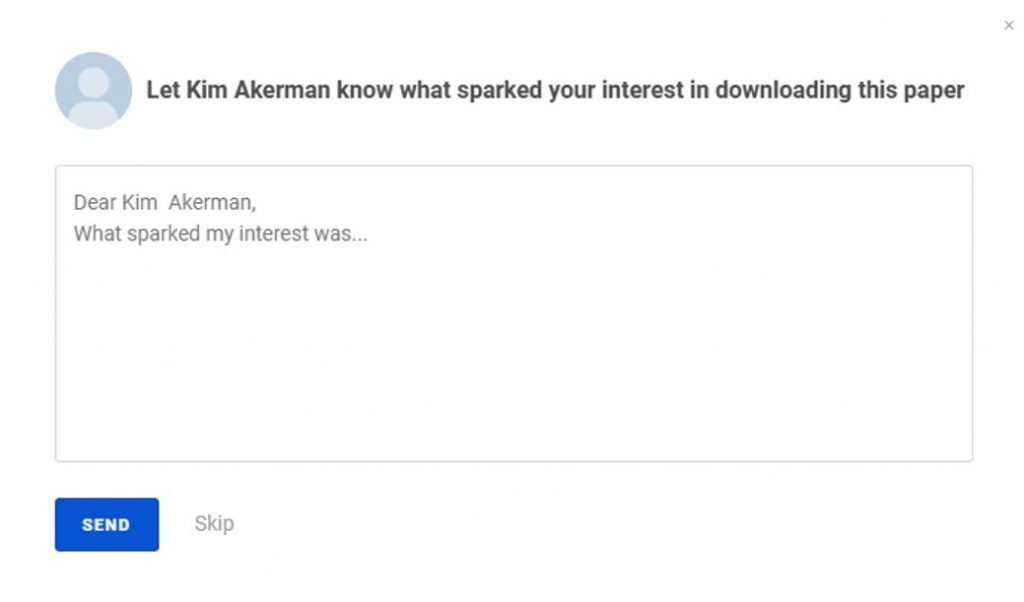
When I became interested in glass as a material, and Kimberley Points as a focus, a quick search on Academia.edu revealed that Kim was the preeminent scholar when it came to these glass points. I started to download one of his papers and Academia.edu asked me if I wanted to let the author know why I was downloading (Figure 1.). I can’t remember exactly what I put, but it was brief and along the lines of “I want to learn how to make Kimberley Points“.
Figure 1. Academia.edu helping me make new friends.
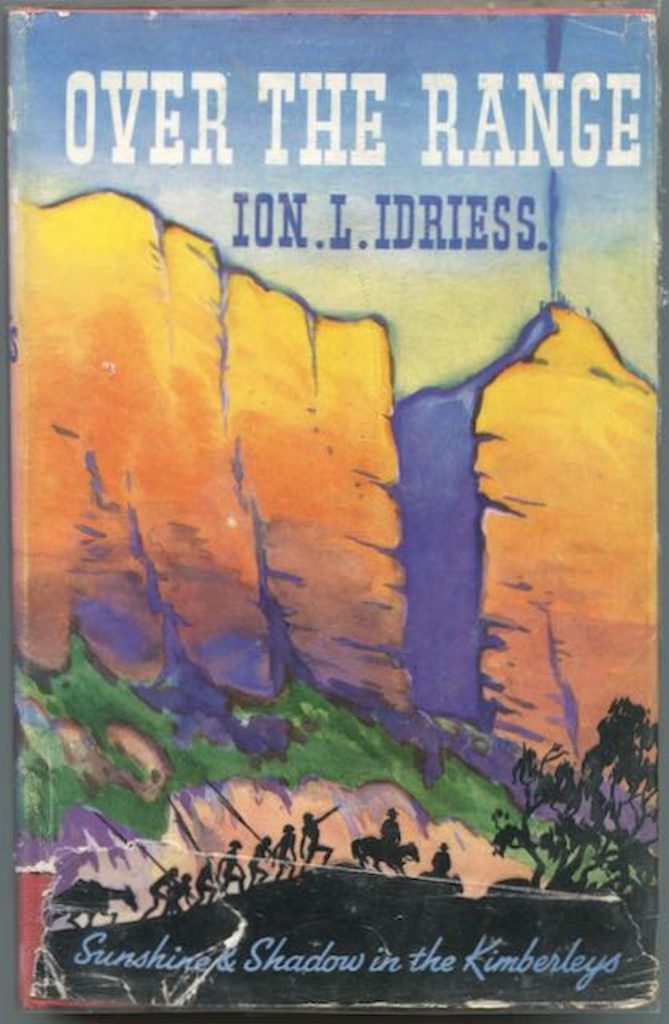
I was pleasantly surprised when Kim quite quickly got back to me, recommending two out of print books (Figure 2.) and offering to email me two of his own Powerpoint lectures to boot. We swapped emails and Kim sent the relevant lectures over (Figure 3.). By then I really did have a lot of valuable information to start my Kimberley Points journey.
Figure 2. One of the two out of print books Kim recommended.
Figure 3. One of the two Powerpoint lectures Kim sent over.
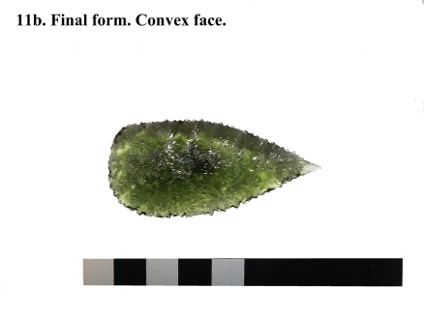
I had Kimberley Points to look at in Manchester Museum, a plentiful supply of period glass to work with, and Kim’s guidance on equipment and process, so I got on with it. It was by through going through the making process that I realised there were things I didn’t understand. So in 2018 I got back in touch with Kim. In particular I was interested in the correct way to turn the edges of the bottle to start the pressure flaking process, and how to avoid losing too much width. In response, Kim made a Rose Leaf point (Figure 4.) and provided me with this breakdown of the complete reduction sequence.
Figure 4. Kim’s completed Rose Leaf point made from a water worn glass fragment.
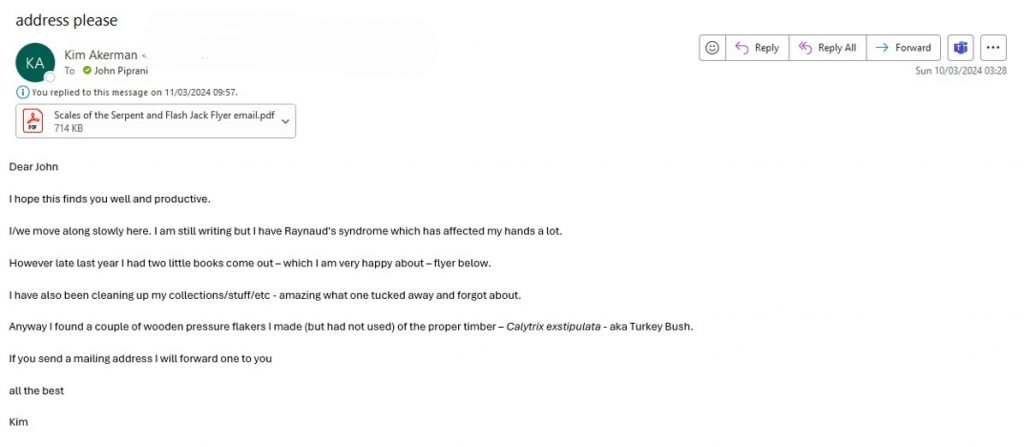
I kept in touch with Kim, intermittently sending him any Kimberley Point related publications or media produced here, for his records, as he asked me to do. In looking back through my emails I realise my first contact with Kim was in or around 2016 on my old student email address, which is no longer accessible. In March this year Kim got in touch to to ask me for my actual address (Figure 5.). He had contracted Raynaud’s Syndrome which had affected his ability to work stone, and he had a Calytrix exstipulata, or Turkey Bush wooden pressure flaker that he was happy to send in my direction.
Figure 5. Kim’s email telling me about how Raynaud’s Syndrome had affected his hands.
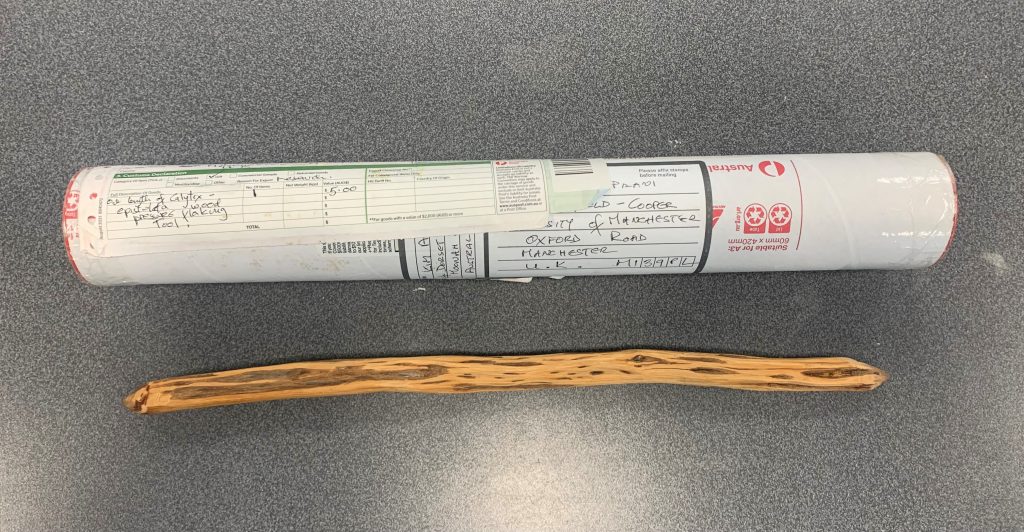
I thought about how I would feel if my body wouldn’t allow me to flint knap again, and realised that for me, and perhaps for Kim, this would be a significant loss. Anyway, I sent Kim the address and a couple of weeks later the pressure flaker arrived in Manchester (Figure 6.).
Figure 6. The tube and Calytrix exstipulata, or Turkey Bush wooden pressure flaker.
I haven’t used the pressure flaker. It still lives in its tube, partly because the pressure flaker, tube and handwritten details seem to capture something for me. It materialises a relationship and Kim’s kindness at a time that I suspect was quite difficult for him. Having said that, I also suspect he would want me to use the pressure flaker, not transform it into some kind of museum object or religious icon!
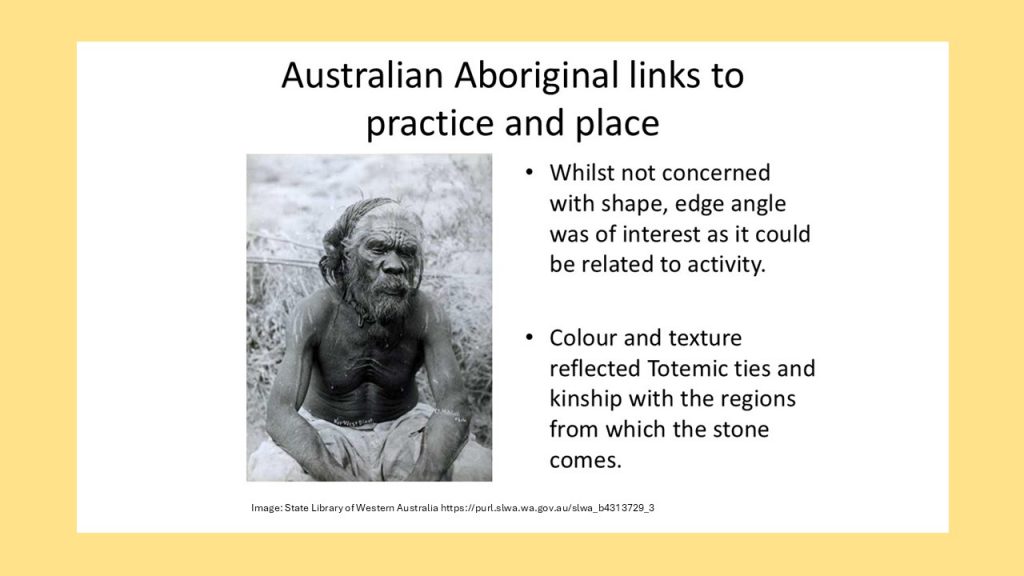
Anyway, I found the need to email Kim again last month. I ran two scraper making sessions here in Manchester, and through that process realised that I discussed an Aboriginal focus upon edge angle (Figure 7.), but didn’t fully understand that aspect myself. I emailed Kim to get some guidance on relevant readings.
Figure 7. My Powerpoint slide discussing an Aboriginal perspective on scrapers.
Again I received a very quick response (Figure 8.), but this time it wasn’t something I would be pleased about.
Figure 8. The automatic email response I received late last month.
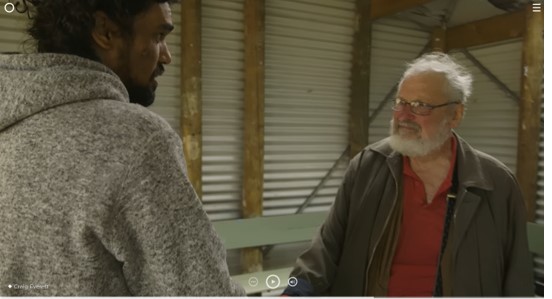
Kim was a very kind and giving person, not just to me, but as this video from the Tasmania Aboriginal Education Services shows, he made a positive impact on many people’s lives. Whilst writing this post does makes me feel tearful, Kim had a rich life, and as the email stated, he died peacefully at his home with his wife, Val. Perhaps a rich life and a peaceful passing with your loved ones close is the best any of us can hope for.
Figure 9. Kim Akerman being thanked by Craig Everett for sharing his knowledge and skills.
I am leading seminars at the moment on an undergraduate second year module at Chester called ‘Communicating the Past’. To complete the module, students have to produce a 1000 word essay discussing the academic sources used for a proposed Key Stage 2 primary school children’s prehistoric activity. They also need a 2000 word plan for the primary school teachers, showing how the children’s activity works, and fits within the curriculum. Finally, they need to produce a 1000 word reflective piece outlining what the students themselves have learnt from the process. I want to use this post to illustrate why I find reflective learning a valuable tool at all stages of the academic process, and beyond.
To do so, I am going to use an activity I have developed for undergraduate archaeology students to introduce them to the stone tool making process. This 50 minute activity involves around 15 students each making a flint scraper and it is assumed they have no prior knowledge of the process. Having run this session over a number of years, it was only at the most recent session at Manchester where a discussion with a student made me reflect and then rethink and develop my understanding of the teaching process.
To link with the module outcomes necessary at Chester, I have broken this discussion down to consider three key elements:
The value of academic texts
Explaining a curriculum activity
Reflecting on, and learning from the process
For the purposes of this blog post, I am going to start with the activity plan and how I relate it to an undergraduate archaeology curriculum.
My activity plan and how it relates to the archaeology curriculum
I primarily use this activity to introduce the students to the bodily process of making a flint scraper. However, it is also useful on a number of other levels. In particular: as an introduction to the terminology associated with a flint flake; to understanding the relationship between material, kinetic energy and angles within the making process; but also to show how our modern western understanding of a scraper is both historically and culturally situated. These elements feed into undergraduate archaeology modules at both Manchester and Chester (e.g. Doing Archaeology 2, HI4001) and within the actual session I deal with the theoretical bit at the beginning using three Powerpoint slides.
Figure 1. Francois Bordes and a Culture History approach
This first slide (Figure 1.) references the 1950s work of French prehistorian and flint knapper, Francois Bordes, who saw a particular type of scraper, in this instance one he categorised as a Quina scraper, as representative of a particular Neanderthal group. I use this slide to illustrate the ‘Culture History’ approach to interpreting artefacts.
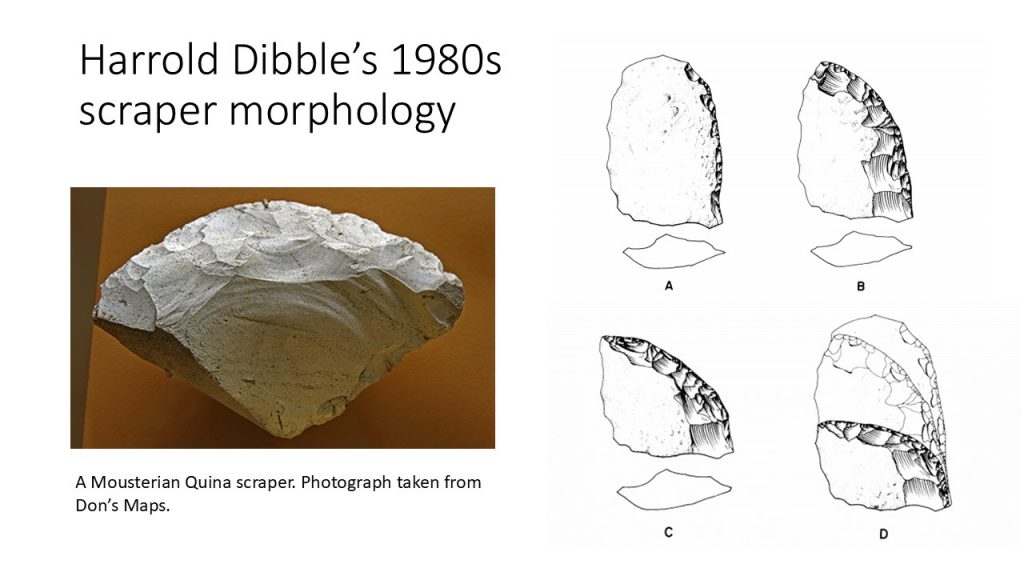
Figure 2. Harold Dibble and the Processual approach
The second slide (Figure 2.) references the 1970s work of the American flintknapper and researcher Harold Dibble. Dibble was interested in the life cycle of the scraper, in particular how the shape changes as the scraper is used, and then resharpened (see illustrations on the right hand side of the slide). He used the fact that shape was dynamic and not static to argue that it was not so useful to think of scrapers as typological signifiers for culture groups. I use this example to illustrate a ‘Processual’ approach to archaeology.
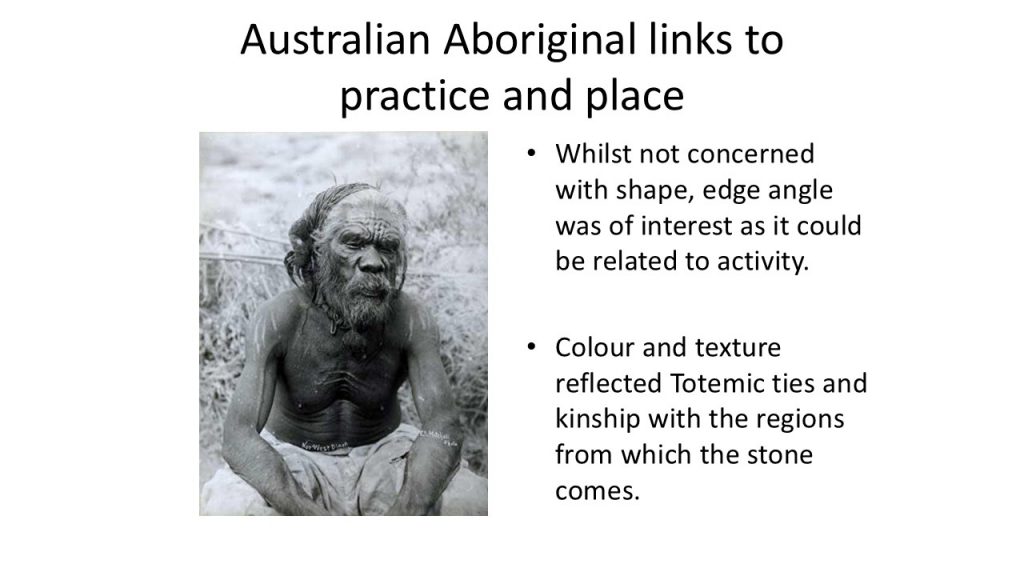
Figure 3. Anthropology and an Aboriginal Australian approach
The third slide (Figure 3.) takes an anthropological perspective, and looks at how Australian Aboriginals would be concerned not with shape, but things like material colour and texture, as well as edge angle. As the slide outlines, totemic ties, kinship relations and what the scraper was designed to be used for, these were the issues an Aboriginal would be looking at.
After ticking the ‘academic box’ we move onto the making process. I direct the students to the necessary protective equipment before providing a demonstration. I select a large flake so everyone can see my process, and explain the difference between the smooth ventral and scarred / cortical dorsal surface. After highlighting the platform and bulb of percussion, I use a felt tip pen to draw the desired scraper shape onto the ventral face, with the bulb of percussion as the potential ‘handle’ (Figure 4.).
Figure 4. A large flake with scraper shape outlined using felt tip pen
I then select a hammer stone, show the correct angle to hold the flake, ventral surface uppermost, and start taking removals from the edges, moving towards the central felt tip outline. As I encounter thicker areas, I draw attention to how the sound changes, and then provide a discussion of how to hit things effectively. Once the desired shape has been achieved, I use a coarse sandstone to abraid away any sticky out bits. Finally, I demonstrate scraper use on a thin birch branch removing the bark. After the demonstration, the students select their own flint flake and hammerstone and then have a go.
Reflecting upon what I have learned from this process
Going around the students, I check where they are up to and help them overcome any difficulties, such as how to hit harder or more accurately. One student had finished his scraper and scraped the branch, but I could see his scraper was blunt, and the edge he had produced was not at an ideal angle for scraping. My diagnosis was that he had held the flake at an incorrect angle when making the scraper. This was not the end of the world as we could remedy this when he re-sharpened it. However, it made me start to think. I learnt how to make a scraper from the professional flint knapper, Karl Lee, and he emphasised the angle at which to hold the flint flake to produce a useful scraper. As discussed above, I have repeated this instruction to students over the years but without considering the Aboriginal perspective that I present at the beginning of the session (figure 3). I have unconsciously absorbed the idea that there is one correct angle to hold the flake in order to make a scraper. However, if the slide about Aboriginal knappers that I present is correct, then there must be more than one way of holding the flint flake in order to get more than one edge angle. Why had I not recognised this before? Probably because I am not using scrapers in practice and so I am not so knowledgeable about the different uses, and therefore the various edge angles.
The academic sources I am using
This leads to the interesting bit. Because I have been delivering this session over a number of years, I could not remember where I had read about the Aboriginal perspective on scrapers. This is obviously a missing component that could really enrich my session, so I am now at the stage of having to find out more information. Being a big fan of the social aspects of archaeology, my first step was to email my main contact in Australia, Kim Akerman, an academic and stone tool maker who has been really helpful to me in the past by directing me to relevant sources when I was originally looking into Kimberley Points. I would always encourage people to contact specialists in the area they are interested in, however, this is another story. Using the library search facility and term: Aboriginal Australian scraper edge angle, I am currently working through the relevant papers that come up, with the aim of understanding more fully the Aboriginal relationship with edge angle and tool function. I can then integrate this knowledge into my undergraduate scraper making exercise.
Concluding thoughts
I emphasise reflective learning because I think it it illustrates how both teaching and learning is a process, not a product. I have a stone tool based PhD, am a competent stone tool maker and have been teaching undergraduate archaeology modules for the last six years. Whilst I have a good level of archaeological knowledge and understanding, I am absolutely still on my learning journey. As part of the PhD process, it is necessary to learn about teaching theories and learning styles, to understand the range of ways we learn, and therefore the range of ways we can teach. One of the most useful learning styles I have adopted is that of David Kolb and his experiential learning cycle. Kolb’s learning cycle has four stages. He presents an initial ‘active’ or ‘concrete’ phase of doing, let’s say, making a scraper. This active phase is followed by a reflective phase, considering how things went, and what changes to process could be made so that a better end result is achieved. The third phase of Kolb’s cycle involves doing the activity again, but this time integrating the considered changes to the process. The fourth phase is again reflective, looking at what has been produced and considering whether or not the change to process has helped to achieve a better end result, or scraper.
At first encounter, the reflective process can seem passive, sat thinking, devoid of action. I have found writing this blog / website a useful and active reflective learning tool that has really helped me develop my understandings. This has been primarily in relation to learning the stone tool making process, but as you can see with this post, also with my teaching and learning within archaeology more generally. In other words, doing something, like making a scraper, then writing about the process, is valuable in helping us to learn. Funnily enough, this is exactly what this Chester module is asking students to do; to develop an active reflective process. As discussed here, reflective learning is a strategy that has value at whatever stage of the academic process you are working at, and I would argue, beyond a particular subject area. Many archaeology students go on to work in areas beyond archaeology and the aim of this blog post is to illustrate the value of learning strategies as well as subject specific knowledge. For those who are interested, this link provides more information on David Kolb’s learning cycle, and experiential learning in general.
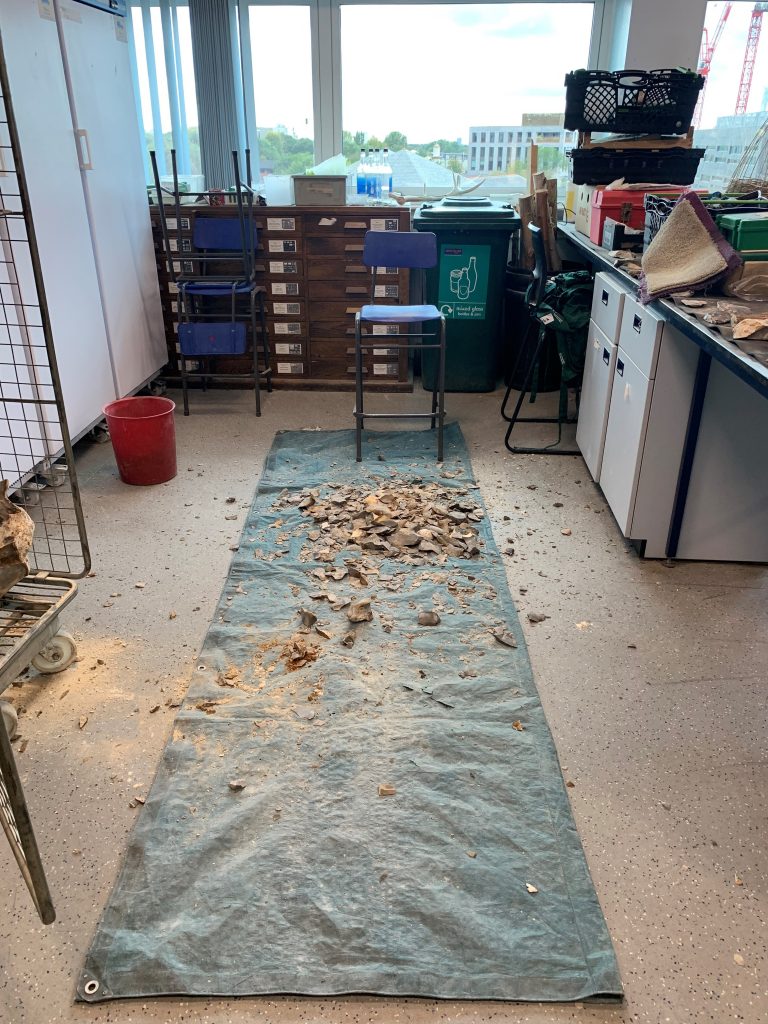
I recently went on the above workshop, mainly because I know that flintknapping creates dust and I should make sure that we are practicing safely.
So this week two colleagues from Geography popped over to measure the amount of dust generated in a mini handaxe making workshop. The main outcome was, I need to hoover up rather than brush up afterwards, as that is when most of the dust is airborne.
A second outcome was a spare flake left over and I turned it into this nicely shaped handaxe on Friday. Anyway, it has some interesting features. Mainly cortex on the dorsal surface, and some areas of original flake ventral on the other surface.
I was a little disappointed that I didn’t clear all the original ventral from the surface, however, from a teaching and learning perspective it illustrates dorsal and ventral really well. My relationship to this handaxe has changed since making it. I have shifted from aesthetically disappointed to pedagogically excited. It just took me a while to become fully acquainted!
This is a strange time of year for me. Relatively quiet diary wise and along the corridor, but work wise I have a lot to do within the couple of weeks before term starts.
This flexibility inevitably means I end up in the lab and doing what I am obsessed with at the moment, making handaxes. However, over the past two days things have not gone so well.
I have been trying to work the big chunks I have had lying round for a long time, but seem to be just destroying stuff, rather than being able to make anything. I think it is because I have so much going on in my head it is difficult for me to slow down and focus.
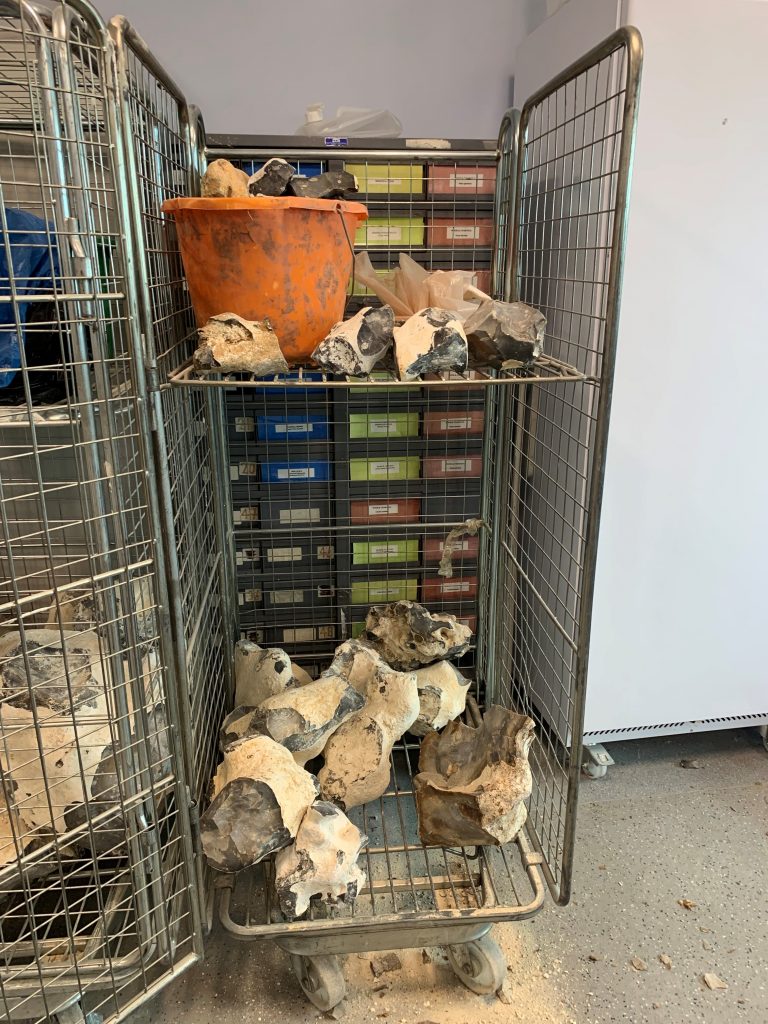
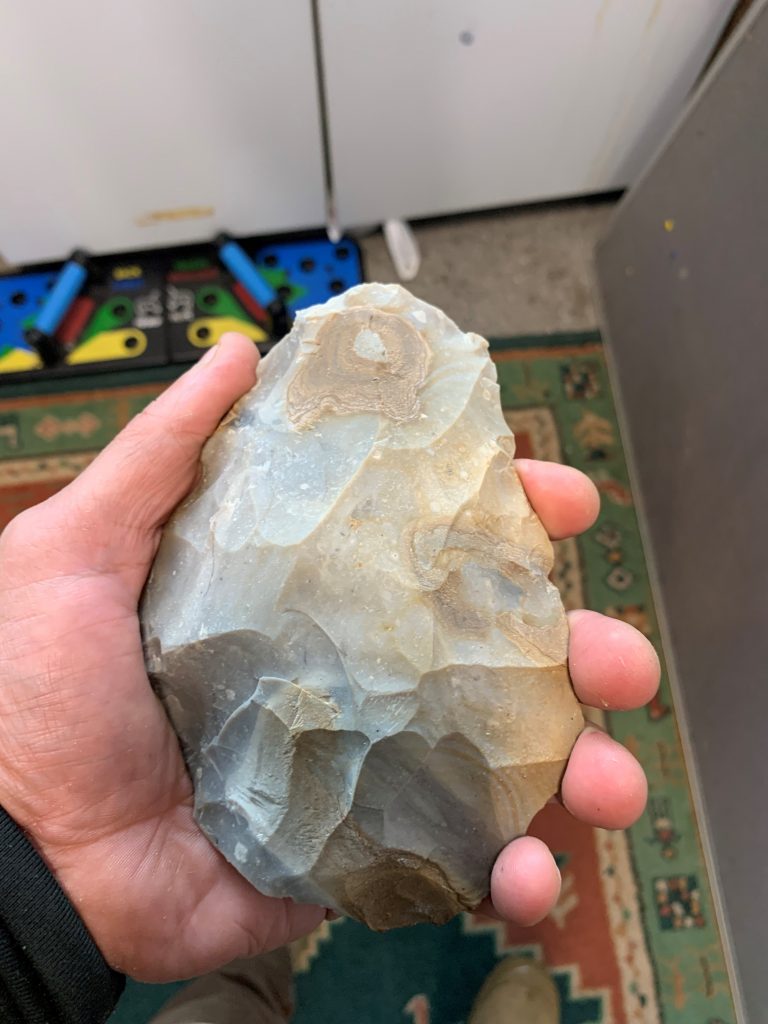
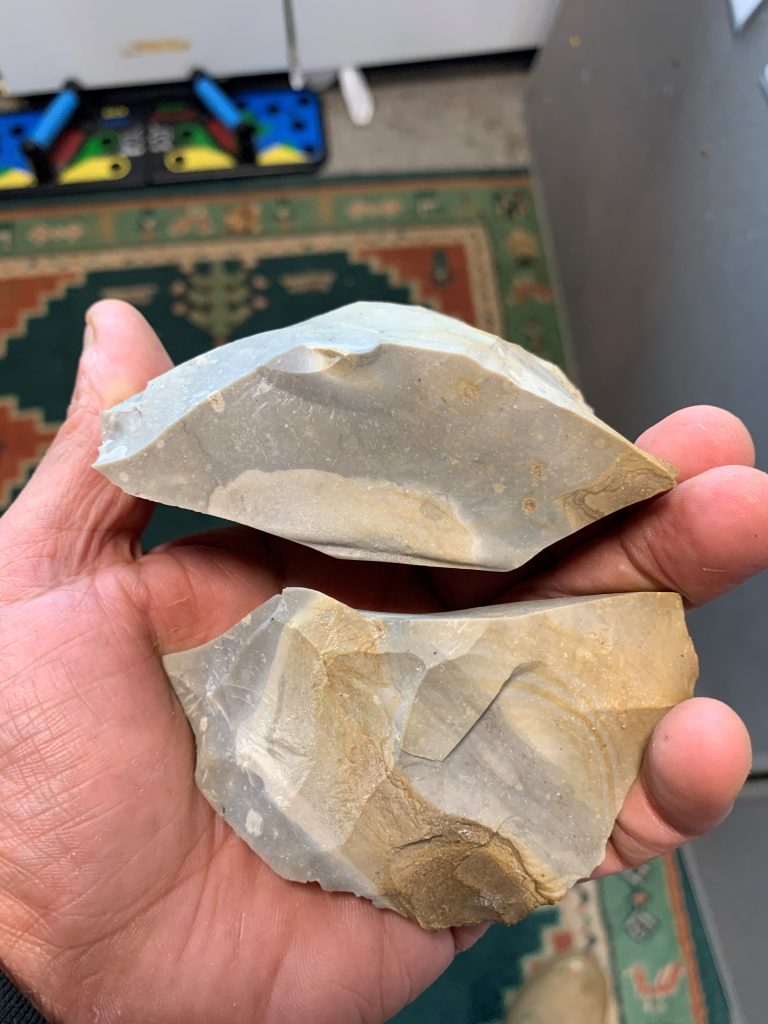
Anyway, I was pretty pleased with this handaxe preform. It was a large clean flake removal from the bottom right nodule in the cage. So far so good. The hard hammer shaping went well and I moved onto the soft hammer. The thing to note on the above photo is the dark brown inclusion at the bottom near my little finger. This material was a lot harder than the flint it was sat within.
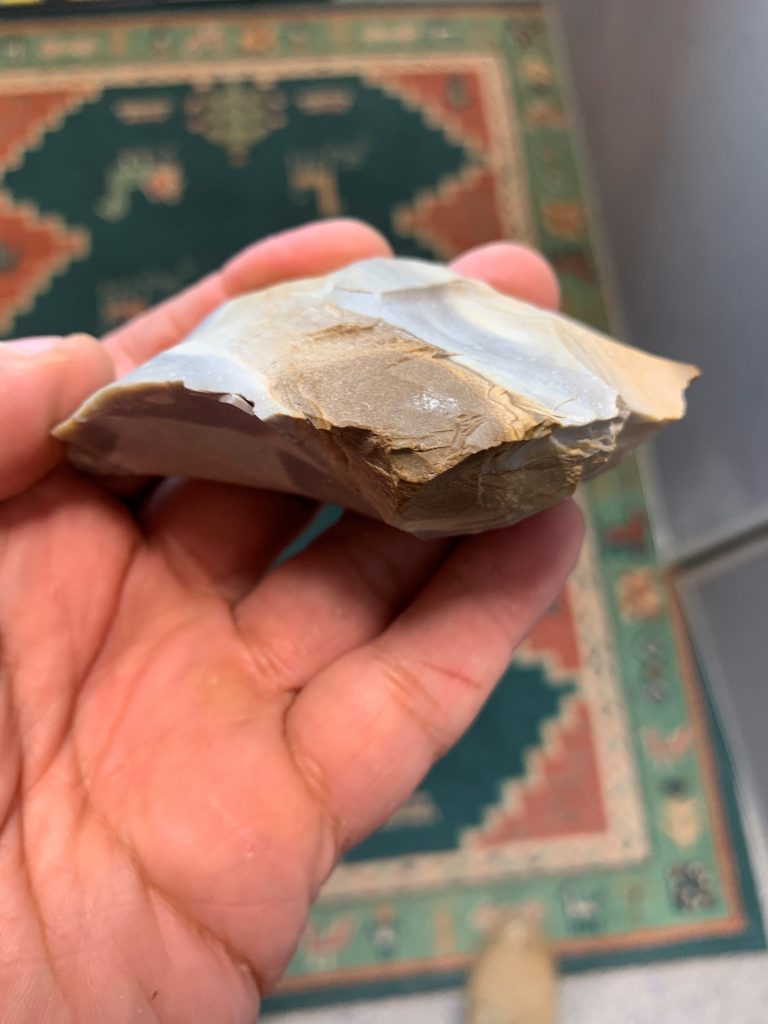
This is a better view of the hard section. Soft hammer wise I do not have so much choice, they are all a pretty similar size, and I could have done with something heavier to take longer flakes from this particular flint, but I did not have that option, so I just had to hit it faster with the aim of increasing the kinetic energy and therefore impact. Above is an example of what I would class as a good platform, both low and isolated, or sticking out a bit. All the ingredients to produce a good clean removal.
However, I hit the platform of hard material, again and again with no result, until this happened. Increasing the impact at one end has split the handaxe preform in the middle. I know this as endshock, although I do not fully understand the phenomena, I just avoid hard hits at one end of a handaxe. With this example I was working with it on my leg, held down at the distal end and hitting hard the proximal. I wonder if my leg acted as a fulcrum and it gave way in the middle? Is this the same as endshock? I don’t know, but I am keeping this as a really interesting example of something or other.
The image above is from a postcard I picked up in 2011 (I think) whilst at an archaeology conference at the University of Southampton. It has been framed and sat on my wall since then and I only recently found out the the glass replica of a Boxgrove handaxe featuring on the postcard was made by a knapper called Tim Ace. Tim’s handaxe inspired me then and has been instrumental in my enthusiasm for glass as a material to work with now.
Fast forward to 2016 and I had finished my stone tool based PhD and found I had time to learn how to flintknap. This was something I had failed to do up to then, in spite of working closely with both John Lord and Karl Lee. The main issue was lack of practice due to a lack of access to flint in the north west of England where I live. The above video was really useful in reminding me of the value of using glass to practice, and it was this video that got me going with arrowheads.
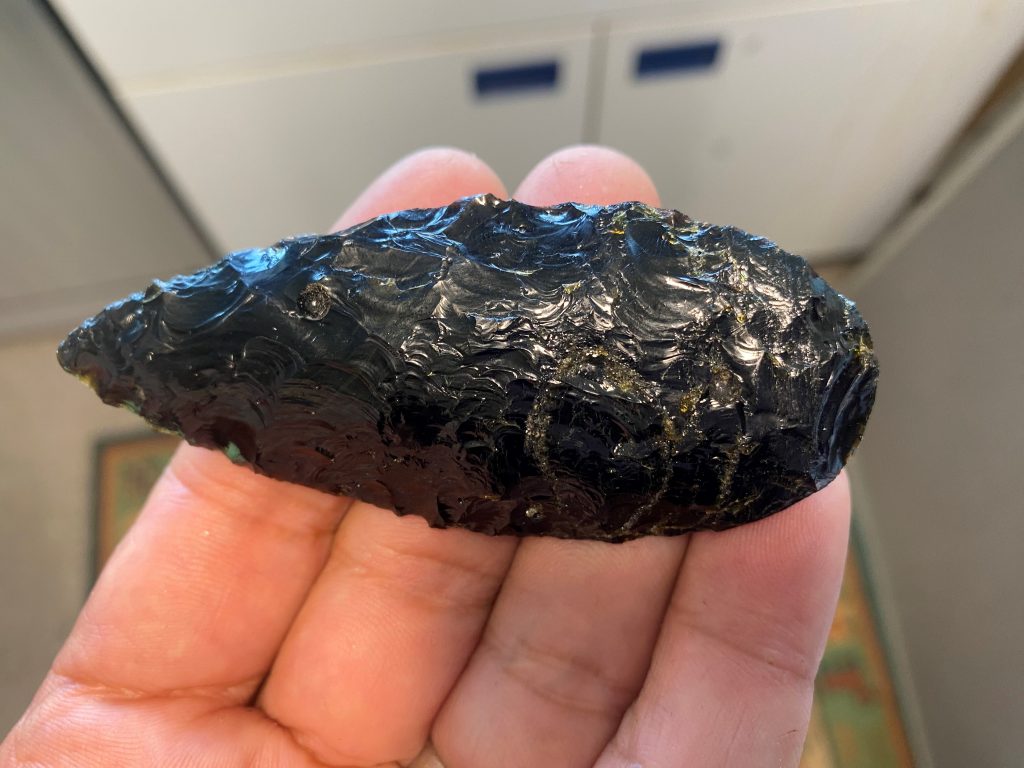
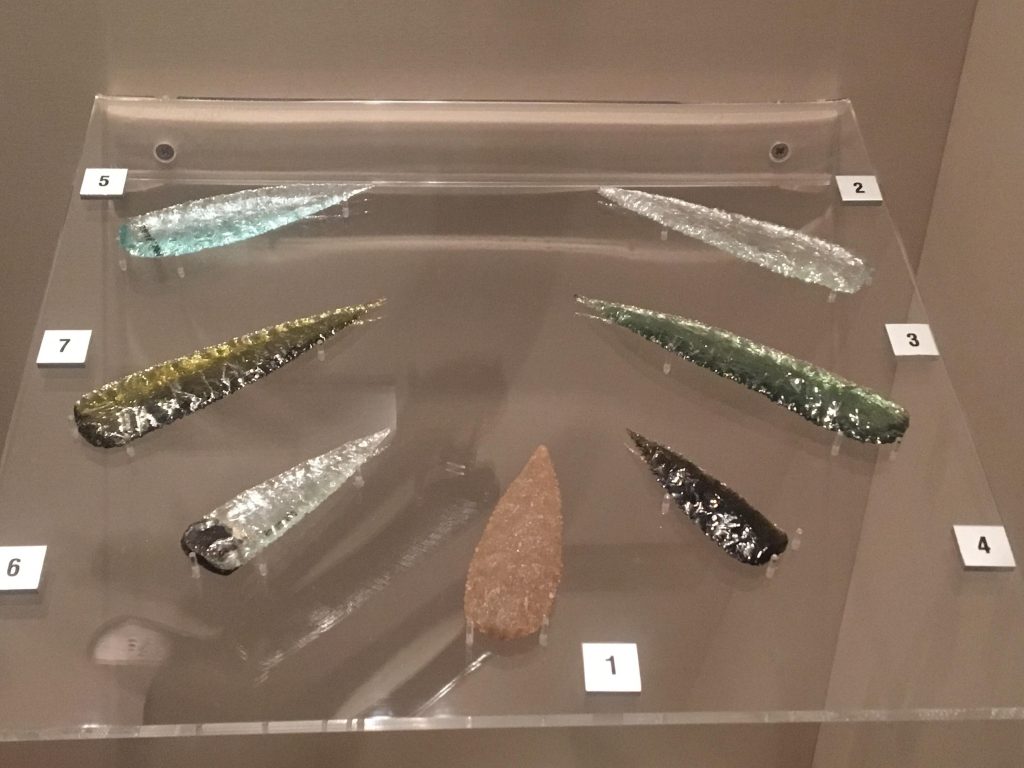
The above image was taken in the Liverpool World History Museum in 2017 (I think) and is of their collection of glass and stone Kimberley Points. When I realised Australian Aboriginals also used glass I became really excited about researching their points and methods. A number of people helped me on this learning journey as discussed here, but as well as helping me develop my pressure flaking skills, this journey provided me with a real insight into the social aspects of stone tools and their production.
And now it is 2024, and after many years spent hunched over in my back yard, I sort of know what I am doing. The above was a big flat slab of good quality glass from the Didsbury Oxfam shop (£3) and it is now a large pointy handaxe. We are in the lovely Spanish city of Valencia at the moment, and today I came across a woman in her studio making glass to produce her own glass jewellery. That would be like a dream for me. Having my own small studio space in a lovely city like Valencia, and being able to knap beautiful glass handaxes all day, interrupted only by the occasional cafe con leche.